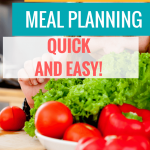
Doesn’t it seem like weekly meal planning is 10 times harder when you’re trying to eat healthy? Want to know how to make healthy meal planning quick and easy?
I have to be honest and tell you that I haven’t always been a fan of making a meal plan. Even today, there are at least 10,000 other things I’d rather be doing.
Like you, I enjoy using meal plans when they’re finished, but I loathe making them. I stared at a blank sheet and wondered where to start.
Thinking of healthy options everyone would like to eat was hurting my brain.
I was so frustrated with meal planning that I quit for over a year. But that was a big mistake—no, a colossal mistake. My family spent a lot more money and ate a lot less healthy food, but we really wanted to eat healthy.
So, I didn’t want to give up or give in. Thankfully, I came up with a low-cost and straightforward process and some shortcuts, and I want to share them with you!
I think you will find this process much faster, easier, and adaptable to your family’s tastes!
Exhausted and Overwhelmed?
This Self-care Starter Guide will show you 3 simple steps to take RIGHT NOW to better care for yourself.
Be sure to grab yours!
Get your FREE copy of the Self-care Starter Guide HERE!

Make Healthy Meal Planning Quick and Easy
I have listed the step-by-step process to prepare your notebook system for use in Post 2 – where I describe how to create #1, #3, #4 from the list below. This post will describe the process of how to use the notebooks for meal-planning which will be #2, #5 from the list below.
How to Put the Pieces Together and Build Your Meal Planning Process
Notebook 1 will hold:
- The Family Shortcut Lists. (2 lists – each list in a protector)
- The Weekly ‘Family Pre-Approved’ Menu Plan (1 list in 1 protector)
- All weekly recipes (listed on that week’s Weekly ‘Family Pre-Approved’ Menu Plan) (4-10 recipes will have 2-5 protectors)
- Blank printed copies of The Weekly ‘Family Pre-Approved’ Menu Plan templates (5-10 copies in 1 protector)
- Used menu plans (2-3 in 1 protector)
Notebook 2 will hold:
- ‘Family Pre-Approved Recipes’ (multiple sheet protectors, separated with notebook dividers)
How to Use the Meal-Planning Notebook System
This is the process I use to make my healthy meal planning quick and easy. I usually complete my meal plan for the week on Sunday evening but you can do this anytime that is convenient for you.
Create The Weekly ‘Family Pre-Approved’ Menu Plan (#2) to Make Healthy Meal Planning Quick and Easy
Preparation
- Take a quick inventory of what is in the refrigerator, freezer, and pantry.
- Open a grocery list app.
- Gather any store ads.
- Take a blank Weekly ‘Family Pre-Approved’ Menu Plan template out of the protector.
- Grab a blue or purple erasable colored pen
 .
. - Add dates to days if desired – note conflicts in the family’s weekly schedule with mealtimes.
Start Planning By Column
- Start planning the menu. I like to work in columns so for this example, I’ll use BREAKFAST. (To make planning breakfast even easier, I generally use the same weekly pattern each week. For example, omelets on Monday, oatmeal on Tuesday, etc. Either my family likes the routine, or no one cares; the key is that they don’t complain. I do this super quick by using the menu plan from the previous week (see #5 in the list at the top, under Notebook #1) And, to make this process even easier, I’m just going to type all of the breakfast into the template before I make copies next time.
- Look at the MEAL FOODS (Shortcut List #1) List in the breakfast column to see approved foods.
- Compare foods/ingredients of what is required, what is on hand, and if desired, what is on sale in grocery ads. Start adding foods to the menu plan.
- Place needed food/ingredients on grocery list or app. (Be sure to go to the grocery store before you have to prepare the menu items with missing ingredients!)
- I repeat until breakfast is full. (For my family I leave Saturday open for something special and Sunday is 1 of 2 things or a restaurant). (PS Typically I don’t need a recipe for breakfast or lunch unless it’s a special occasion. I will add the ‘find a recipe step’ in dinner below.)
Complete All Snacks at Once
- SNACKS Look at the SNACK FOODS (Shortcut List #2) List. For each entry, choose either a protein or dairy and a fruit or vegetable. I try to place the most perishable foods earlier in the week. Pantry stable foods or less perishable produce is placed on the plan towards the end. Complete both snack columns at once so you can spread out the options and keep snacks variable. And, don’t forget that non-perishable foods can be utilized if an outing is planned during snack time to avoid having to eat fast-food.
Create Shortcuts as You Move Forward
- LUNCH Look at the MEAL FOODS (Shortcut List #1) List to see approved foods. I use some of the same weekly patterns each week by using the previous week’s menu plan. Changes are typically due to sales or seasons.
- If the family is home I make this more elaborate. If I’m home alone and everyone is out, I usually plan & prepare lunches for all of us using leftovers, sandwich or salad, fruits, and veggies. My family rarely buys lunch while at school or work due to the poor nutritional levels and flavor (biggest reason honestly), and higher cost.
Menu-Planning Dinner is Fast & Easy!
- Finally, DINNER, which used to be the most challenging for me. Using the Shortcut List #1 has been a game-changer!
- And, I have made it even simpler with a few more shortcuts (Am I a genius or just lazy? Not sure but it works!):
- Taco or fajita night 1 x a week
- Leftover night at least 1 x a week
- Meatless Monday (rotation of 4 options)
- Eating out for a big lunch and cereal for dinner on Sunday.
- Look at the MEAL FOODS (Shortcut List #1) List to see approved foods. (This is especially helpful for the food budget if seasonality and sales are considered.)
- Find a meal item – check to see if that item requires a recipe. If yes, find the recipe under the correct section in Notebook 2, which houses all of the Family Pre-Approved Recipes. Review the list of ingredients and compare to your available ingredients (add items as appropriate to grocery list). Write the name of the recipe on the menu plan in the correct place.
- Remove the recipe (leave it in its sheet protector) from Notebook 2 and place it into Notebook 1 (place in front of the shortcut lists. It works best to put the recipes in order of use during the week.)
If you use the shortcuts above, you really only need to plan for 3 dinner meals a week!
The completed Weekly ‘Family Pre-Approved’ Menu Plan will be the first thing you see when you open Notebook 1.
Then, each Family Pre-Approved Recipe you need for that week will be found lined up behind the Weekly ‘Family Pre-Approved’ Menu Plan, in the order you need them.
Using the Meal-Planning Notebooks Daily Makes Healthy Meal Planning Quick and Easy
As you move forward throughout the week, look on the menu for the food item, and then just look through 2-5 dividers of recipes. You can either leave the recipe in the notebook all week or pull it out to use it while cooking and return it to Notebook #2 when the meal is finished.
This meal planning process has worked out to be a super awesome solution for me. I hope this makes healthy meal planning quick and easy for you also.
The beauty of this system is that nothing goes into the Family Pre-Approved Recipe Notebook until after the recipe has been tested and approved by my family. So, the entire notebook is full of recommended options WHICH HELPS because it even makes healthy meal planning quick and easy for your spouse and kids!
Give them the notebooks and the template – and in no time the job is done!
In closing, meal planning is a wonderful way to eat healthier and save money at the grocery store. With this simple process and a few more shortcuts, it makes healthy meal planning quick and easy. You can keep making better choices and healthy meals for your family – without the usual stress and frustrations!
Ready to make yours? Remember how easy it is from post 2? Look around your house for the supplies. If you need to buy some I have links for you. You just need 2 inexpensive notebooks, a cheap box of ![]() sheet protectors, and these inexpensive but Ah-mazing! erasable gel pens.
sheet protectors, and these inexpensive but Ah-mazing! erasable gel pens.
You can start one today – it’s a build as you move forward project – and then you’ll be making healthy meal plans the quick and easy way too! Share this post with a friend!

Be sure to grab your FREE Self-care Starter Guide! Lisa Kimrey is a 33-year veteran registered nurse (RN), speaker, and author of the Bible study, The Self-care Impact: Motivation and Inspiration for Wellness. At Mylifenurse, Lisa combines her nursing expertise with Scripture-based encouragement to show readers who serve and care for others how to begin and maintain their self-care journey – without feeling guilty or overwhelmed – to feel happy, healthy, and rejuvenated.